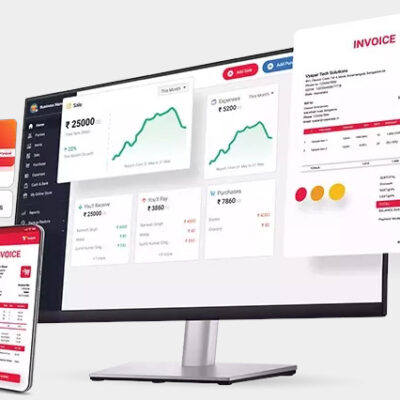
Creating a billing and invoicing solution using Microsoft Excel is a practical approach for small businesses, freelancers, and individuals who need a simple yet effective way to manage their billing processes. Excel offers a range of features that make it ideal for creating customized invoices, tracking payments, and maintaining financial records. Here’s a step-by-step guide to creating a billing and invoicing solution in Excel:
Sure! Below are step-by-step instructions to create an Excel-based billing and invoicing solution. Follow these steps to set up a functional invoice template with automated features.
Step 1: Setting Up the Invoice Template
- Open Excel and Create a New Workbook:
- Open Microsoft Excel.
- Create a new workbook by clicking on
File>New>Blank Workbook. - Save the workbook with a relevant name, such as “Billing and Invoicing Solution”.
- Design the Invoice Layout:
- On the first sheet (Sheet1), design the layout of your invoice. Include the following sections:
- Header: Company name, address, phone number, email, and logo (optional).
- Client Information: Client’s name, address, and contact details.
- Invoice Details: Invoice number, date, due date.
- Itemized List: Columns for item description, quantity, unit price, and total price.
- Total Section: Subtotal, taxes (if applicable), and grand total.
- Footer: Payment terms, bank details, and a thank you note.
Here’s an example layout:
A1: [Your Company Name]
A2: [Your Company Address]
A3: [Your Company Phone]
A4: [Your Company Email]

B6: [Client Name]
B7: [Client Address]
B8: [Client Phone]

D6: Invoice No:
E6: =MAX($E$5:E5) + 1
D7: Date:
E7: =TODAY()
D8: Due Date:
E8: [Manually enter or use a formula for due date]

A10: Item Description | B10: Quantity | C10: Unit Price | D10: Total Price
A11: [Item1] | B11: [Qty] | C11: [Unit Price] | D11: =B11*C11
[Repeat for each item row]

A20: Subtotal: | D20: =SUM(D11:D19)
A21: Tax (e.g., 5%): | D21: =D20*0.05
A22: Grand Total: | D22: =D20+D21

A24: Payment Terms: [e.g., Net 30]
A25: Bank Details: [Your Bank Details]
A26: Thank you for your business!
Step 2: Adding Formulas and Automations
- Calculate Line Totals:
- In cell
D11, enter the formula:=B11*C11 - Drag the fill handle down to apply this formula to other item rows.
- Calculate Subtotal, Taxes, and Grand Total:
- In cell
D20, enter the formula:=SUM(D11:D19) // Adjust the range according to your item list - In cell
D21, enter the formula for tax calculation (assuming a 5% tax rate):=D20*0.05 - In cell
D22, enter the formula for the grand total:=D20+D21
- Generate Invoice Numbers:
- In cell
E6, use the formula to automatically generate invoice numbers by incrementing the last invoice number by 1:=MAX($E$5:E5) + 1
- Auto-populate Dates:
- In cell
E7, use the formula to automatically fill in the current date:=TODAY() - In cell
E8, you can manually enter the due date or use a formula to add a certain number of days to the invoice date (e.g., 30 days):=E7+30
Step 3: Creating a Payment Tracker Sheet
- Add a New Sheet:
- Click on the
+button at the bottom to add a new sheet. - Rename the sheet to “Payment Tracker”.
- Design the Payment Tracker Layout:
- Create columns for the following details:
- Invoice Number
- Client Name
- Date Issued
- Due Date
- Amount Due
- Payment Received
- Balance
Here’s an example layout:
A1: Invoice Number | B1: Client Name | C1: Date Issued | D1: Due Date | E1: Amount Due | F1: Payment Received | G1: BalanceStep 4: Adding Drop-Down Lists and Data Validation
- Create Drop-Down Lists:
- Select the cell where you want a drop-down list (e.g., client name).
- Go to
Data>Data Validation. - In the
Settingstab, chooseListfrom theAllowdropdown. - Enter the source range for your list (e.g., a list of client names on another sheet).
- Protect the Worksheet:
- Select the cells you want to allow users to edit (e.g., item descriptions, quantities, unit prices).
- Right-click and choose
Format Cells. - Go to the
Protectiontab and uncheckLocked. - Protect the worksheet by going to
Review>Protect Sheetand setting a password (optional).
Step 5: Testing and Final Adjustments
- Test the Solution:
- Create a few sample invoices to ensure that all formulas and features work correctly.
- Verify that the invoice numbers are generated automatically, dates are populated correctly, and totals are calculated accurately.
- Make Adjustments:
- Refine the layout, adjust formulas if necessary, and ensure that the invoice is user-friendly and professional-looking.
Conclusion
By following these steps, you can create a functional and customizable billing and invoicing solution in Microsoft Excel. This solution will help you manage your billing processes efficiently, keep track of payments, and maintain accurate financial records. Excel’s flexibility and powerful features make it an ideal tool for small businesses and freelancers looking for an affordable invoicing solution.
-
Billing & Invoicing Software
Original price was: ₹52.50.₹1.00Current price is: ₹1.00. -
Cars, Bikes & Automobiles Website Designing Service
Original price was: ₹60,000.00.₹45,000.00Current price is: ₹45,000.00. (Onwards) -
Ecommerce Website Designing Service
Original price was: ₹60,000.00.₹25,000.00Current price is: ₹25,000.00. (Onwards) -
Google Ads Service
Original price was: ₹9,000.00.₹5,000.00Current price is: ₹5,000.00. (Onwards) -
Online Payment Gateway
₹1.00 (Onwards) -
Real Estate Website Designing Service
Original price was: ₹60,000.00.₹45,000.00Current price is: ₹45,000.00. (Onwards) -
Shopify Web Store Development Service
Original price was: ₹30,000.00.₹18,000.00Current price is: ₹18,000.00. (Onwards) -
Website Design and Hosting Service for Businesses
Original price was: ₹27,000.00.₹12,000.00Current price is: ₹12,000.00. (Onwards)


